Over the past few weekly builds, we've been rolling out support for WebAssembly, our next major compiler target for Elements.
Built upon our Island platform, this now allows you to write Oxygene, C#, Swift or Java Language code that runs in the WebBrowser parallel to and interacting with JavaScript and the browser document model.
How Does This Work?
Elements compiles your code to native WebAssemly byte code in a .wasm file that you can deploy as part of your website and load into your page just like you would regular JavaScript.
From within your WebAssembly code, you have full access to all the capabilities of your preferred language (Oxygene, C#, Swift or Java, and you can also mix them file-by-file, as always). Of course you also can use our low-level "Island RTL" shared between all Island-based sub-platforms, and our cross-platform Elements RTL, Swift Base Library (for Swift users) and even the "Delphi RTL" compatibility library are available we well.
With a few restrictions (for example, WebAssmebly is currently single-threaded, so certain threading APIs are not available; also – for obvious reasons – there is no direct file system access), you can write Elements code as you would on any other platform (and also share code with other platforms, where desired).
You also have direct access to browser objects, the DOM, and of course you can interact with and expose classes and methods to the JavaScript that runs in the web page (or in separate .js files).
A Closer Look
WebAssembly support is available in Fire, Water and Visual Studio, with Elements 10 build .2241 or later. There's a new "Module (WebAssembly)" template that gets you started with creating a module that's ready to be hosted in a website, and also debugged from within the IDE.
The template creates two files for you: a Program.* source file in the language of your choice, and also an index.html file that you can use for debugging and exploring the interaction.
The program source file provides a minimal "Hello World" entry point, to get you started. The code below shows the Swift version, but the same principles apply if you use Oxygene, C# or Java, as well:
@Export
public class Program {
	public func helloWorld() {
		print("HelloWorld")
		let div = WebAssembly.GetElementById("helloWorld")
		let text = WebAssembly.CreateTextNode("Hello from Elements WebAssembly!")
		div.Call("appendChild", [texty])
	}
}
There's a few things to note here:
- This is regular Swift code. You create classes and methods. You can call even call
print. - Simply applying the
Exportattribute will expose the while class to be used from.html/.js. - The
WebAssemblyclass, provided as part of "Island RTL" for WebAssemby, provides access to useful APIs and for interacting with the DOM.
Here's the .html file that brings it all to life in the browser:
<html>
    <head>
        <title>Module1 Test Page</title>
        <script lang="javascript" src="wasm/RemObjectsElements.js"></script>
        <script lang="javascript" src="wasm/Module1.js"></script>
    </head>
    <body>
        <h1>Module1 Test Page</h1>
        <div id="helloWorld"/>
        <script lang="javascript">
            Module1.instantiate("wasm/Module1.wasm").then(function (result) {
                var program = result.Program();
                program.HelloWorld();
            });
        </script>
    </body>
</html>
Items worth noting:
- Two (optional)
.jsfiles get included to help you with the interaction between your JavaScript and WebAssembly. You don't need to use these, but they provide useful helper functionality and stubs for your WebAssembly objects. These files are automatically generated along with the .wasmfile during build; the first one is a static file, while the second one is generated dynamically by the compiler based on the content of your project. <div id="helloWorld"/>is the div that our Swift code above looked up by callingGetElementById.- After loading the
.wasmfile with the provided helper, you can simply create a new instance of yourProgramclass, and then call any of its public methods.
Running and Debugging
When running this project from the IDE (again, WebAssembly development is supported in Fire, Water and Visual Studio, so both in Windows and Mac), Elements will automatically start up a temporary web server that's serving the Web subfolder of your project (which right now only has the index.html, but of course you can put any more complex web code and resources there as well, or point it to a different folder on your system). It also serves a virtual subfolder "wasm" that points to the output folder of your project (which contains the compiled .wasm and the two helper .js files).
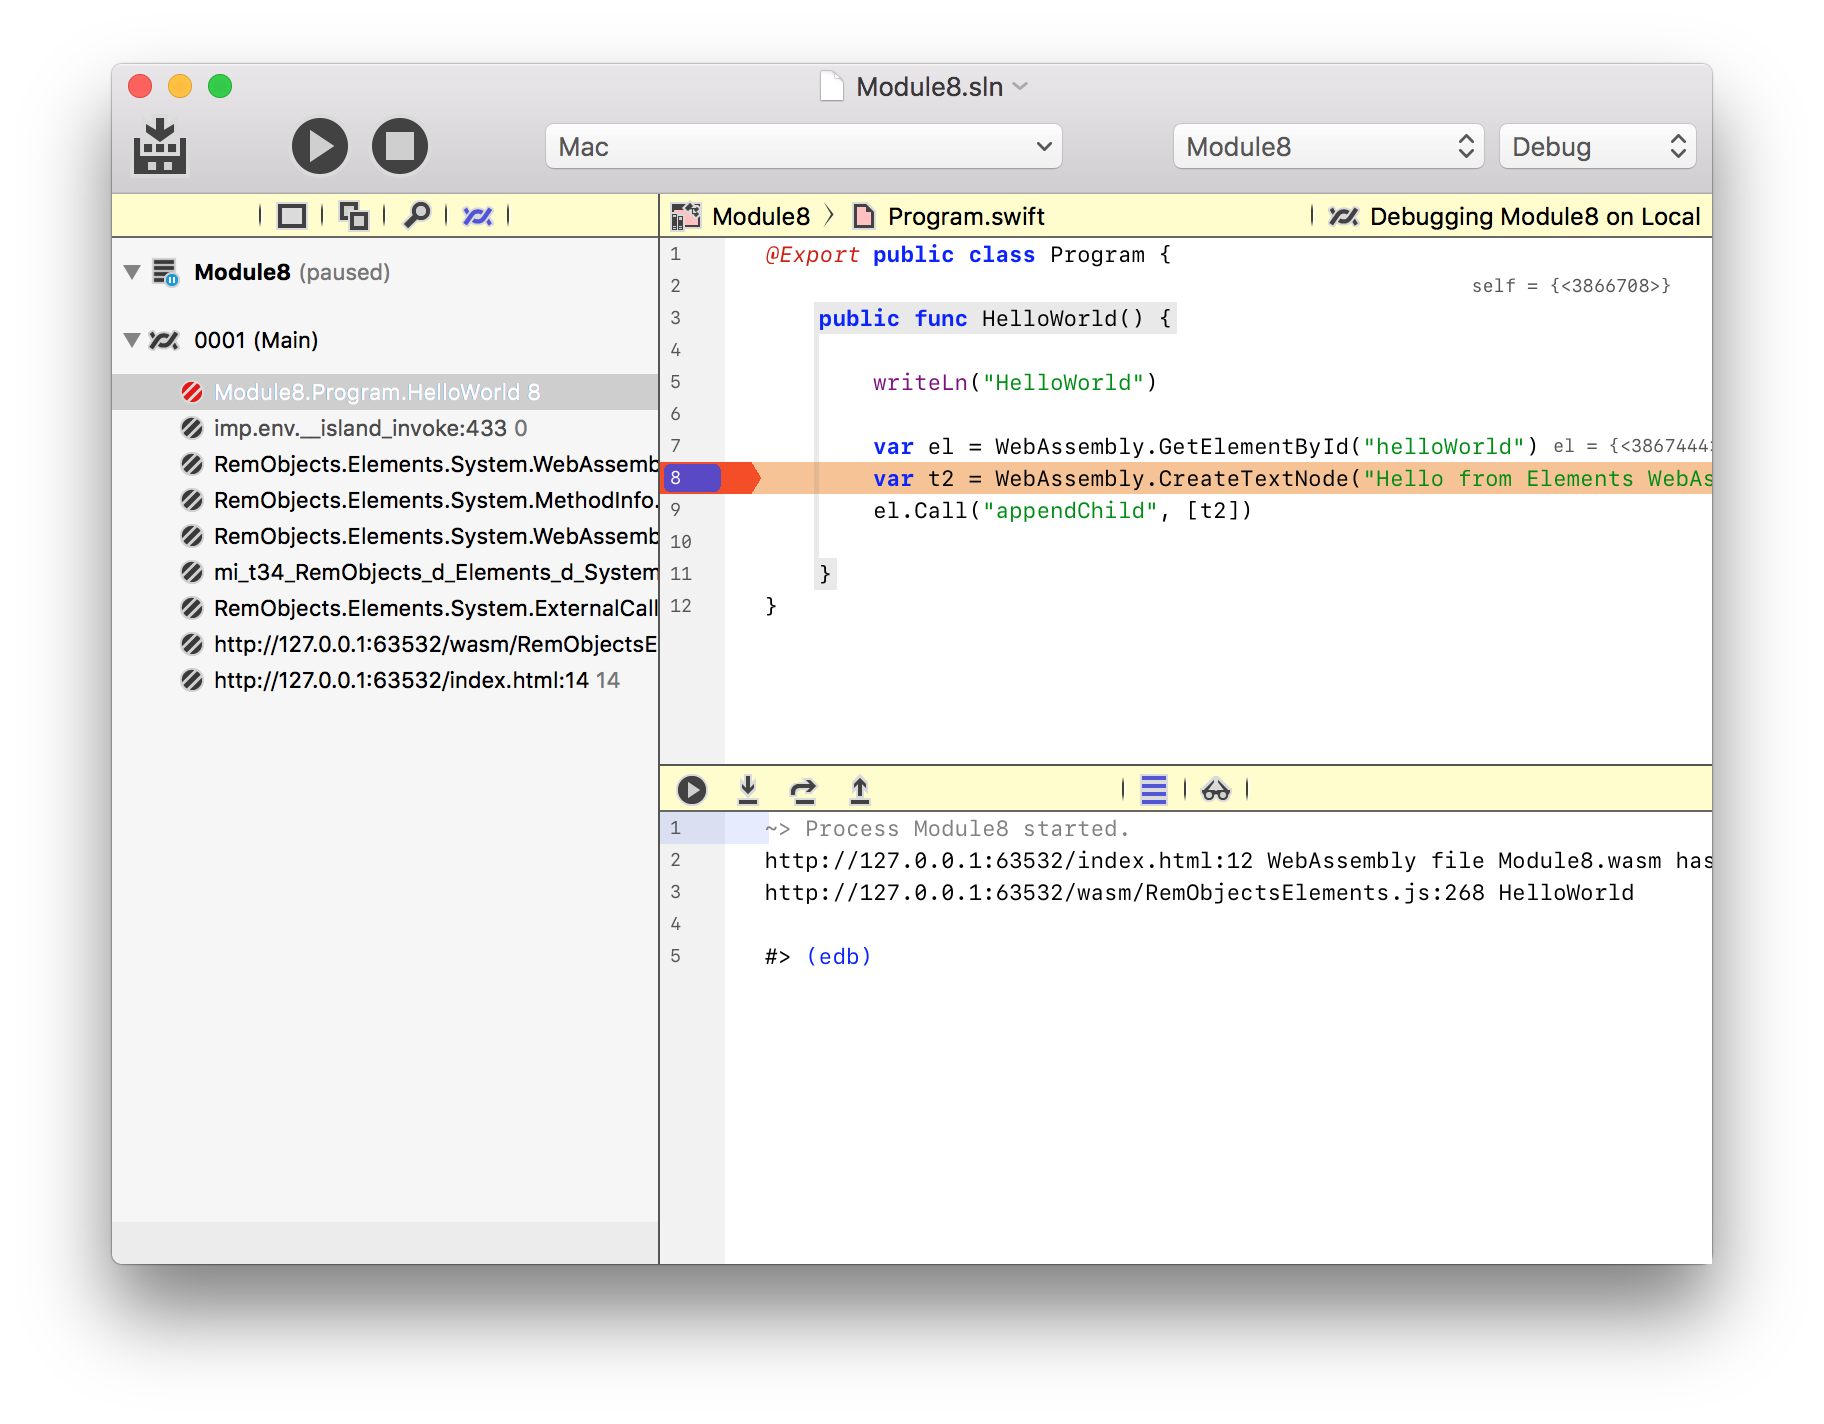
Next, Elements will launch an instance of Chrome in debug mode and attach its debugger to it. Your webpage will load in Chrome and you can view and interact with it there, and also use Chrome's web debugging tools. But Elements' own WebAssembly debugger is attached as well, so you can – for example – set breakpoints in your WebAssembly code to step through it and debug it:

Of course you can also configure debugging to use a different URL, say to use a local or remote IIS or Apache server, as well.
Try It Now
WebAssembly support is ready to use now (in Build .2241 and later), but is not done. We are continuing to make improvements to the APIs for interaction between WASM and JS, and we're looking forward to your feedback!

